How to Create Study Guides for Students in Minutes — Not Hours
Tutoremy Team
Editorial · April 9, 2026
You spend the weekend building a study guide from scratch. Your students glance at it for five minutes before the exam. Sound familiar?
The problem isn't your students — it's the economics of study guide creation. A good guide for a single chapter takes 2-3 hours to write by hand: re-reading the material, pulling out key concepts, writing definitions in student-friendly language, creating practice questions, and formatting it all into something readable. Multiply that across every unit, every class, every semester, and you've burned hundreds of hours on a deliverable that competes with TikTok for your students' attention.
This post is about a better workflow — one where you spend minutes, not hours, and the output is actually more useful than what you'd build manually.
Why Most Teacher-Made Study Guides Don't Get Used
Before fixing the process, it helps to understand why the output often goes unused. It's not laziness. There are three structural reasons:
1. They arrive too late
Most study guides land in students' hands the day before the exam. By then, the students who are going to study have already built their own system. The ones who weren't going to study still won't.
2. They're too long
A well-intentioned 8-page study guide feels comprehensive to the teacher who wrote it. To a student, it feels like a second textbook. The guide needs to be scannable — not exhaustive.
3. They're passive
A document you read is passive. Flashcards you flip, quizzes you answer, summaries you check against your memory — those are active. The format of the study guide matters as much as the content.
What a Good Study Guide Actually Contains
After years of watching what students actually use, the pattern is clear. An effective study guide has five elements:
- A one-paragraph summary of the entire topic (the "if you read nothing else" version)
- Key terms with short definitions — not copy-pasted from the textbook, but in plain language
- 3-5 worked examples showing how to apply the concepts (not just what they are)
- Common mistakes students make on this topic — explicitly called out
- Practice questions with answers — so students can self-test, not just re-read
That's it. No headers in five colors. No clip art. No 8-page Word document. Just the information students need to actively review.
The Manual Way vs. the Upload-and-Generate Way
The manual way (2-3 hours per guide)
You re-read your lecture slides or textbook chapter. You open a blank document. You type headings. You write definitions from memory, checking the textbook when you're unsure. You draft practice questions. You proofread. You format. You export to PDF. You upload to your LMS.
It works. It's thorough. And it takes an entire afternoon.
The upload-and-generate way (under 5 minutes)
You take the materials you already have — your lecture slides, a textbook chapter PDF, a lecture recording — and upload them to an AI tool that generates the study guide for you.
Tutoremy does this for free. Upload a PDF, slide deck, or lecture recording and it produces organized notes, a set of flashcards, practice quiz questions, and a topic summary — all pulled directly from your source material, not hallucinated from a generic model. The output is structured into exactly the five elements listed above.
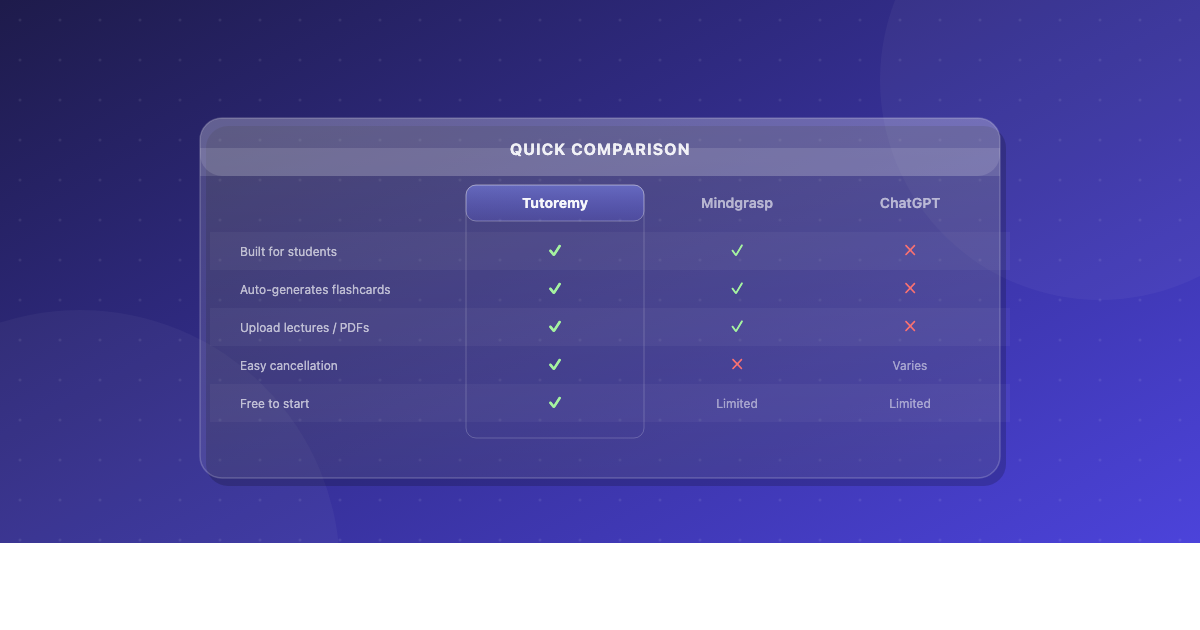
The key difference from generic AI (like pasting your slides into ChatGPT): Tutoremy generates from YOUR uploaded material, not from its general training data. That means the output matches your curriculum, uses your terminology, and covers what you actually taught — not what Wikipedia says about the topic.
What you do with the extra time
Review the generated guide. Edit anything you'd phrase differently. Add a worked example from your own teaching if the AI missed a nuance. Then share it with your class — through your LMS, a shared link, or a PDF export.
Total time: 5-15 minutes, including your review pass. Net savings: 2+ hours per guide.
A Real Example: Creating a Guide for a Biology Unit
Let's say you're teaching cellular respiration to a 10th-grade biology class. You have your lecture slides (32 slides covering glycolysis, the Krebs cycle, and the electron transport chain) and a 45-minute lecture recording.
Manual approach: You'd spend ~2 hours distilling those 32 slides into a 3-page study guide, writing definitions for ATP, NAD+, FADH2, etc., creating 5 practice questions, and formatting it.
Upload approach: Upload the slide deck to Tutoremy. In under two minutes, you get:
- A structured summary covering all three stages
- Flashcards for every key term (ATP, glycolysis, Krebs cycle, electron transport chain, chemiosmosis)
- A practice quiz with multiple-choice questions based on the content of your slides
- A bulleted notes section organized by stage
You review it, tweak one definition that's slightly off, add a diagram note, and share it with your class. Total time: 8 minutes.
Sharing Guides with Your Entire Class
Creating the guide is half the workflow. The other half is distribution. A few options that work:
- LMS upload — Export as PDF and post to Google Classroom, Canvas, Schoology, or whatever your school uses
- Direct link — Share a link students can access on any device. No login required on their end
- Print — For classes where screen access is limited, the PDF export prints cleanly
The goal is reducing friction. If a student has to create an account, download an app, or navigate three menus to find the guide, they won't use it. The fewer clicks between "teacher shares" and "student reviews," the better.
For Parents: This Works at Home Too
If you're a parent helping your child study, the same workflow applies. Take whatever materials the teacher sent home — a textbook chapter, a study packet, a set of notes — and upload them to Tutoremy. You'll get organized notes, flashcards, and practice questions your child can use to review.
It's especially useful when your child says "I don't know what to study" — the generated guide gives them a concrete starting point. And it's free to try, so there's no cost barrier to testing it out.
What About Quality? Can You Trust AI-Generated Guides?
This is the right question to ask. Here's the honest answer:
AI-generated study guides are very good at extraction — pulling key terms, summarizing concepts, and generating standard practice questions. They're less good at nuance — catching the one edge case your professor emphasized, or knowing that your class uses a non-standard definition for a term.
That's why the workflow includes a review step. You're not delegating the teaching — you're delegating the formatting. The AI handles the time-consuming extraction; you handle the 5-minute quality check where your expertise matters.
In practice, teachers who use this workflow report that 85-90% of the generated content is usable as-is. The remaining 10-15% needs minor edits — a rephrased definition, a removed flashcard that's too trivial, an added practice question on a topic the AI under-covered.
The Short Version
If you take one thing from this: the bottleneck in study guide creation isn't the content — you already have that in your lectures and materials. The bottleneck is the extraction and formatting. Automating that step saves you hours per guide and gets materials into students' hands faster.
Try it with one unit. Upload your slides or a chapter PDF to Tutoremy (it's free), review the output, share it with your class, and see if it changes how you spend your prep time.